A Flatbread for the Pan: Dough That Needs No Oven
A good pan flatbread bends instead of cracking, but small changes in dough thickness, surface moisture, and skillet heat can shift it from tender to tough. Learn how to diagnose common problems and adjust the next round.
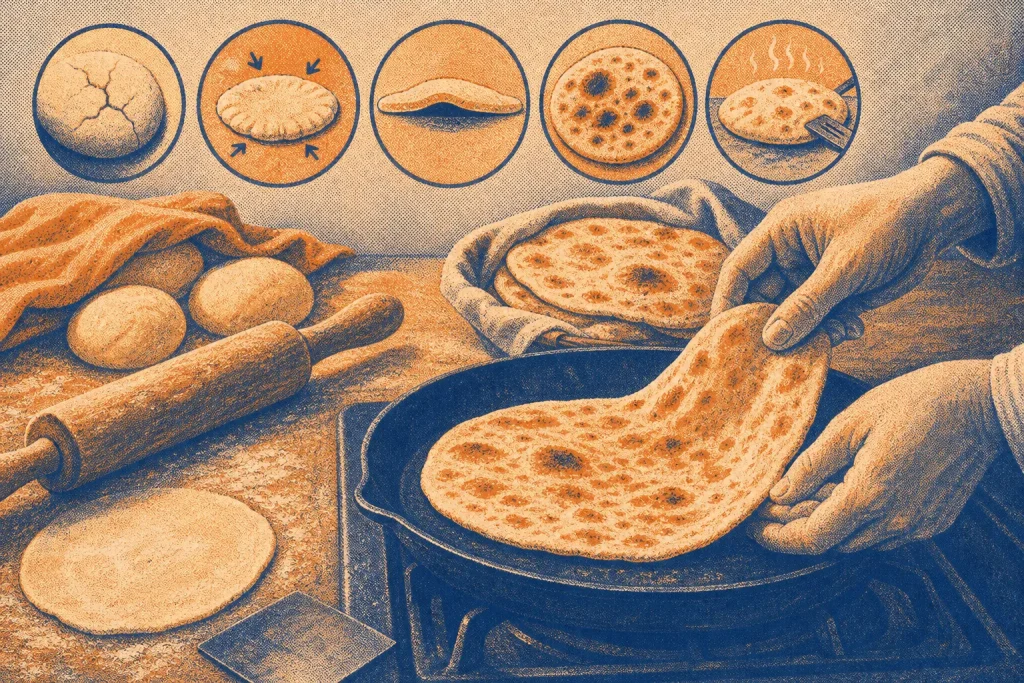
The common mistake with pan flatbread is treating every round like a miniature loaf: make it thick, turn the heat high, and wait for dramatic browning. That combination often leaves a doughy middle beneath a scorched surface. A flexible flatbread needs enough time for its center to cook, but not so much heat or exposure that the outside dries before the inside softens.
The useful clues are in the dough and in the pan. Thickness controls how quickly heat reaches the center; the skillet controls how quickly the surface colors. When a batch goes wrong, change one thing at a time. That makes it easier to tell whether the problem came from the dough, the rolling, or the cooking.
Dough That Cracks
If a round splits as you roll or fold it, the dough may be too dry, insufficiently rested, or both. Flour absorbs water gradually, so a dough that seemed manageable just after mixing can feel tighter later. A well-rested dough also relaxes, making it easier to roll without pulling back.
First, cover the dough and let it rest before rolling. Keep the portions covered as you work, since an uncovered surface can dry into a thin skin. If the dough still feels stiff and breaks at the edges, knead in a little water with damp fingers, then cover it and allow it to relax again. Add water sparingly: a sticky dough is harder to roll cleanly, and it can cling to the counter.
For rounds that crack only when folded after cooking, check whether they were cooked too long or left uncovered in a dry place. Stack the warm breads under a clean towel. The trapped warmth softens them, much as a lid keeps a pot from drying out between servings.
Dough That Shrinks
A round that keeps springing back is usually resisting the rolling pin. This often happens when the dough has not rested long enough after kneading, or when a portion has been worked repeatedly. Forcing it thinner makes the center uneven and can tear the surface.
Stop rolling and cover the portion for a short rest. Then roll from the center outward, turning the dough as you go. If it still retracts, leave it alone again rather than pressing harder. A little bench flour can prevent sticking, but too much gets incorporated into the surface and encourages dry, stiff patches.
Imagine you have divided a batch into balls and the first one keeps snapping back while the others wait. Cover that ball, roll a different portion, and return to it after the pause. The expected visible change is a round that stays closer to the shape you roll, with less force and fewer ragged edges.
Uneven Thickness
Thick centers and thin rims cook at different rates. The thin edge may turn crisp before the middle loses its raw, gummy feel. Conversely, a very thin center can dry out while a thicker edge remains pale. This is a shaping problem, not a reason to keep the bread on the pan indefinitely.
Before cooking, hold each round up briefly or lay it flat and inspect it from the side. Look for a center that rises into a mound or an edge that has been rolled almost translucent. Use gentle, even strokes and rotate the dough frequently. If the rim is thicker, guide the rolling pin across it rather than pushing the center flatter.
A consistent thickness matters more than a perfect circle. A slightly irregular round with a similar thickness throughout is easier to cook evenly than a neat circle with a heavy center.
Pale Or Scorched Spots
Uneven color usually points to uneven contact or heat. A pan that is not fully warmed can leave the bread pale for too long, tempting you to overcook it later. A pan that is too hot can blacken patches before the rest of the surface has time to cook. Burner hot spots and a warped skillet can also create inconsistent browning.
Preheat a heavy skillet over medium heat, then cook one round as a gauge. Look for small bubbles and scattered brown marks, not a uniform dark crust. If black patches appear almost at once, lower the heat and let the pan settle before continuing. If the bread stays pale and firm without bubbling, allow the skillet to warm more thoroughly or raise the heat slightly.
Keep the pan dry unless your recipe specifically calls for oil. A thin film of oil changes the surface from a dry, flexible bread toward a fried one. Brush away loose flour between rounds; flour left in the skillet can burn and leave bitter flecks on later breads.
Raw Or Tough Centers
A raw-feeling center can come from dough rolled too thick, a pan that is too hot, or both. High heat colors the outside quickly, so the cook may remove the bread before the middle has time to set. Toughness can follow the opposite pattern: the bread stays on the pan too long while a low flame slowly drives out moisture.
For the next round, roll it a little thinner and use moderate, steady heat. Turn it when bubbles begin to form and the underside shows scattered color. The second side usually needs less time. If large bubbles inflate while the surface remains pale, press them gently with a spatula to help the bread make contact with the skillet, then watch for a change in color and flexibility.
Let each cooked round rest under a towel rather than stacking it in open air. If the batch is already tough, keep the breads covered while warm and serve them soon. Covering will not reverse a severely overcooked center, but it can help prevent further drying.
Sticking And Tearing
Dough that sticks to the counter can tear when lifted, especially if it has been rolled very thin. The usual causes are a damp work surface, dough that is unusually soft, or too little dusting flour. Use a light dusting on the counter and rolling pin, and lift or turn the round during rolling so it does not bond to the surface.
If the dough remains sticky, dust the surface lightly rather than burying the whole portion in flour. A bench scraper can lift a delicate round without pulling at its edge. If a tear appears, pinch it closed and let the dough rest before rolling again. A small hole may remain, but it is usually better to cook the round than to press in extra flour and make that patch tough.
Adjust One Variable
When troubleshooting, keep the dough covered and note what changed: softness after mixing, ease of rolling, thickness, and the pan’s response. If rounds crack, address hydration or rest. If they scorch outside while staying raw within, reduce the heat and roll thinner. If they remain pale and firm, check whether the pan has warmed adequately. These clues turn each imperfect bread into useful direction for the next one.
Once the dough rolls without fighting, aim for an even sheet and a pan that browns gradually. That combination gives the center time to cook while the surface stays tender enough to fold around a filling or tear alongside a meal.